Installing and activating the plugins
Go to Plugins from dashboard and begin installing all the required plugins for the theme(Shopzone Pro). You can see the suggestions of all the plugins which are essential for the theme.

Elementor plugin
This theme is made compatible with the elementor plugin. The frontpage can be set up using the widgets available from the theme.
How to Use Elementor Plugin?
Since the theme is compatible with the elementor plugin, one should be familiar to use the elementor plugin. Here are the steps that you can refer to use the elementor plugin.
- Install Elementor. Make sure you have your WordPress installation ready, along with Elementor page builder installed.
- Edit a new page with Elementor.
- Insert an Elementor Template
- Make the template full-width.
- Add a widget.
Widgets from the Elementor plugin?
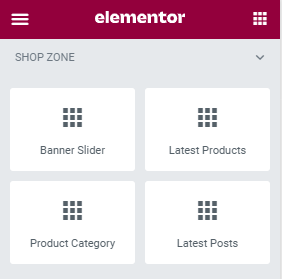
There are altogether 4 widget available in the elementor plugin from the Shopzone Pro Theme. All the widgets are explained below:

How to manage Shop Zone Banner Slider widget?
First of all click on “Edit with elementor” button. You will reach the elementor edit page. There you will you be able to find the widget “Edit Banner Slider widget” :
Further you can adjust the layout of the section via “Advanced” setting option.
- Slider Content:
- Category type: This option will allow you to choose the category to display on this section.
- Total Posts: This option will allow you to adjust the no of post to be displayed in this section
- Button Label: This options allows you to add button text in slider.

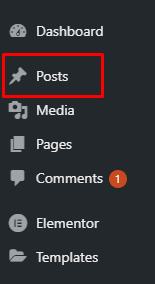
The Post displayed under this section comes from the post added from the backend.

How to manage Shop Zone Latest Products widget?
First of all click on “Edit with elementor” button. You will reach the elementor edit page. There will you be able to find the widget “Edit Shopzone Latest Products widget” :
Further you can adjust the layout of the section via “Advanced” setting option.
- Content:
- Section Title: This option allows you to edit the header of the widget.
- Total Posts: This option will allow you to adjust the no of post to be displayed in this section
- Enable Add To Cart Button: This option will allow you to enable/disable the Add To Cart Button.
- Display Ratings : This option will allow you to enable/disable the ratings.

How to manage Shopzone Product Category widget?
First of all click on “Edit with elementor” button. You will reach the elementor edit page. There will you be able to find the widget “Shopzone Product Category widget” :
Further you can adjust the layout of the section via “Advanced” setting option.
- Content:
- Section Title: This option allows you to edit the header of the widget.
- WC Product: This option will allow you to choose the category to display on this section.
- Total Posts: This option will allow you to adjust the no of post to be displayed in this section.
- Enable Add To Cart Button: This option will allow you to enable/disable the Add To Cart Button.

The Post displayed under this section comes from the post added from the backend.

How to manage Shop Zone Latest Posts widget?
First of all click on “Edit with elementor” button. You will reach the elementor edit page. There will you be able to find the widget “Shopzone Latest Posts widget” :
Further you can adjust the layout of the section via “Advanced” setting option.
- Content:
- Section Title: This option allows you to edit the header of the widget.
- Total Posts: This option will allow you to adjust the no of post to be displayed in this section.
- Display Date: This option will allow you to enable/disable the date.
- Display Author Name: This option will allow you to enable/disable the author name.
- Display Category: This option will allow you to enable/disable the category name.

The Post displayed under this section comes from the post added from the backend.

WooCommerce plugin
This theme is made compatible with the WooCommerce plugin. The section in the frontpage is set using the product from the WooCommerce.
How to Use WooCommerce Plugin?
Since the theme is compatible with the WooCommerce plugin, one should be familiar to use the WooCommerce plugin. Here are the steps that you can refer to use the WooCommerce plugin.
- Install WooCommerce. Make sure you have your WordPress installation ready, along with WooCommerce installed.
- Add new products from dashboard by going to Admin Panel > Products > Add New via WooCommerce plugin.
