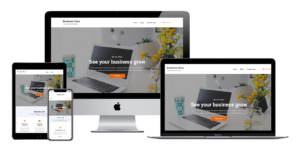
Set up the front page as shown in the demo
The demo is divided into different section as shown in the image below:

The different sections are described below:
Top Header Section, Site Identity and Primary Menu Section
This section is setup from Admin Panel / Appearance / Customize / Theme Options / Top Bar Options.
Refer to How to manage Top Bar Options? for more details.
The Site Identity section is setup from Admin Panel / Appearance / Customize / Site Identity and for Primary Menu section you need to create a menu and assign its location to Primary Menu going to Admin Panel / Appearance / Customize / Menus / Menu Location.
Refer below How to manage Site Title, Logo, Tagline and Site Icon? and How to manage Menus? for more detail.
How to manage Front Page Options?
1. From Customize section, go to Front Page Options.
2. From Front Page Options, you will see different sections. They are:
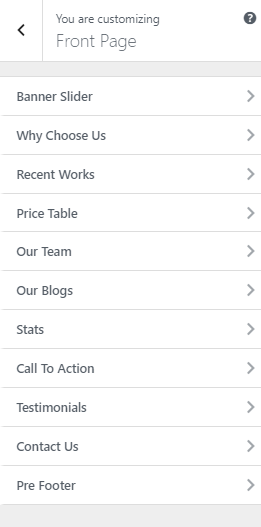
The above section are described below:
How to manage Banner Slider Options?
1. From Customize section, go to Front Page Options.
2. From Front Page Options, you will see Banner Slider Options.
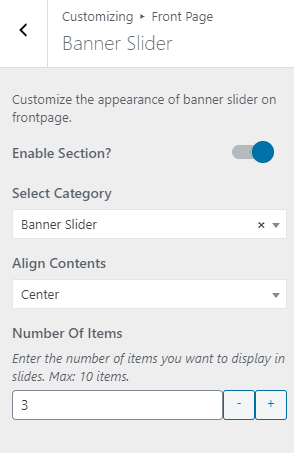
3. In Banner Slider Options you will see:
- Enable Section?: This option allows you to enable/disable the banner slider.
- Select Category: This option allows you select the category to display in this section.
- Align Contents: This option allows you to chose the alignment for the text in slider section.
- Number Of Items:This option allows you to limit the no of items in the section.
How to manage Why Choose Us Options?
1. From Customize section, go to Front Page Options.
2. From Front Page Options, you will see Why Choose Us Options.
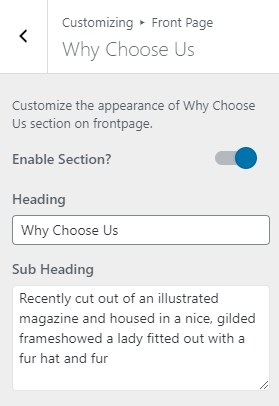
3. In Why Choose Us Options you will see:
- Enable Section?: This option allows you to enable/disable the banner slider.
- Heading: This option allows you select the category to display in this section.
- Sub Heading: This option allows you to chose the alignment for the text in slider section.
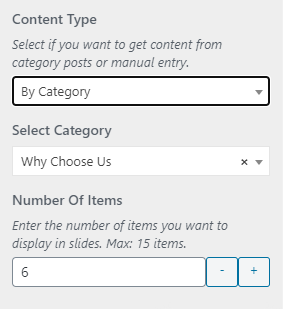
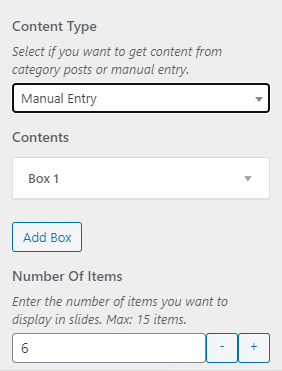
- Content Type:This option allows you to chose the content type. There are two options available.
- Select Category:This option allows you to select the category.
- Number Of Items:This option allows you to limit the no of items in the section.
- Manual Entry:This option allows you to enter the content.
- Contents:This option allows you to enter title,icon.
- No of Items:This option allows you to limit the no of items in the section.
How to manage Recent Works Options?
1. From Customize section, go to Front Page Options.
2. From Front Page Options, you will see Recent Works Options.
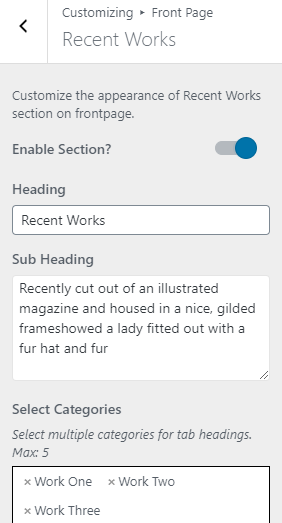
3. In Recent Works Options you will see:
- Enable Section?: This option allows you to enable/disable the recent work section.
- Heading: This option allows you add the heading.
- Sub Heading:This option allows you add the sub heading.
- Select Categories:This option allows you to select the category.
How to manage Price Table Options?
1. From Customize section, go to Front Page Options.
2. From Front Page Options, you will see Recent Works Options.
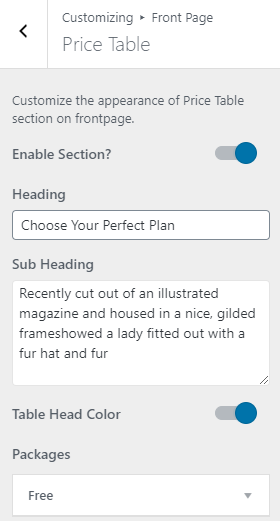
3. In Recent Works Options you will see:
- Enable Section?: This option allows you to enable/disable the price table section.
- Heading: This option allows you add the heading.
- Sub Heading:This option allows you add the sub heading.
- Table Head Color:This option allows you to enable the table head color.
- Packages:This option allows you to add the category entering the package title,price,duration.
How to manage Our Team Options?
1. From Customize section, go to Front Page Options.
2. From Front Page Options, you will see Our Team Options.
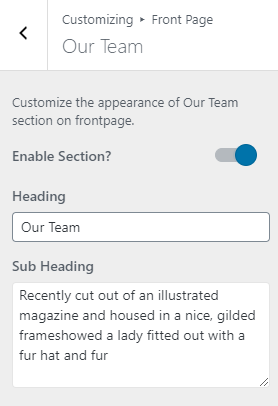
3. In Our Team Options you will see:
- Enable Section?: This option allows you to enable/disable the Our Team section.
- Heading: This option allows you add the heading.
- Sub Heading:This option allows you add the sub heading.
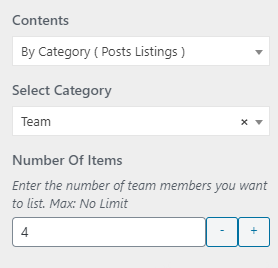
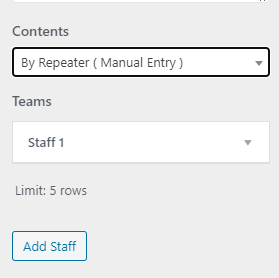
- Contents:This option allows you to select the content to be displayed in this section.
- Select Category:This option allows you to select the category.
- Manual Entry:This option allows you to enter the content.
- Number Of Items:This option allows you to limit the no of items in this section.
How to manage Blog Options?
1. From Customize section, go to Front Page Options.
2. From Front Page Options, you will see Blog Options.
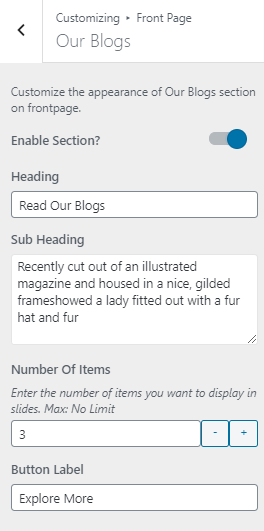
3. In Blog Options you will see:
- Enable Section?: This option allows you to enable/disable the Blog section.
- Heading: This option allows you add the heading.
- Sub Heading:This option allows you add the sub heading.
- Number Of Items:This option allows you to limit the no of items in this section.
- Button Label:This option allows you to edit the button label.
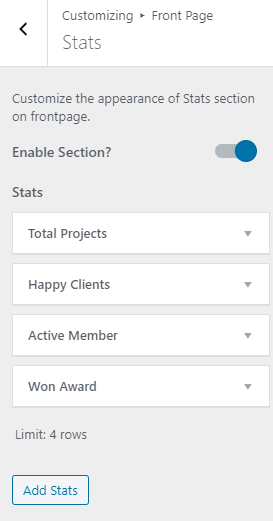
How to manage Stats Options?
1. From Customize section, go to Front Page Options.
2. From Front Page Options, you will see Stats Options.
3. In Stats Options you will see:
- Enable Section?: This option allows you to enable/disable the Stats section.
- Stats: This option allows you add the stats.
How to manage Call To Action Options?
1. From Customize section, go to Front Page Options.
2. From Front Page Options, you will see Call To Action Options.
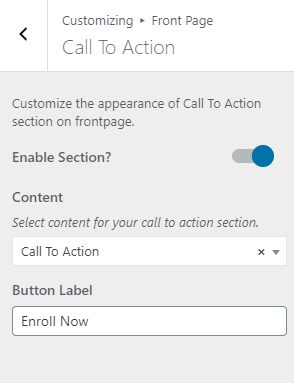
3. In Call To Action Options you will see:
- Enable Section?: This option allows you to enable/disable the CTA section.
- Content: This option allows you select the content to be displayed in this section.
- Button Label: This option allows you edit the buton label.
How to manage Testimonials Options?
1. From Customize section, go to Front Page Options.
2. From Front Page Options, you will see Testimonials Options.
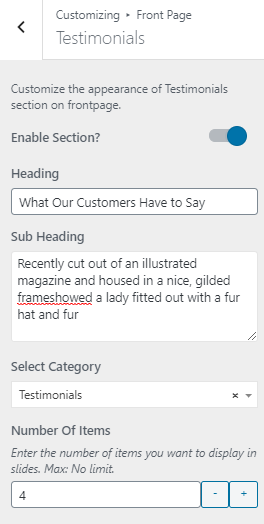
3. In Testimonials Options you will see:
- Enable Section?: This option allows you to enable/disable the testimonials section.
- Heading: This option allows you to add the heading.
- Sub Heading:This option allows you to add the sub heading.
- Select Category:This option allows you to select the category.
- Number Of Items:This option allows you to limit the no of items in this section.
How to manage Contact Us Options?
1. From Customize section, go to Front Page Options.
2. From Front Page Options, you will see Contact Us Options.
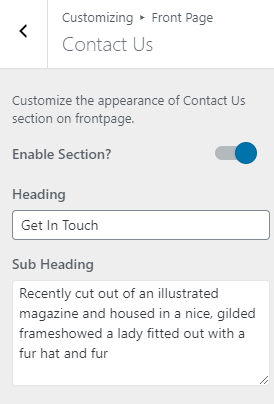
3. In Contact Us Options you will see:
- Enable Section?: This option allows you to enable/disable the Contact Us section.
- Heading: This option allows you add the heading.
- Sub Heading:This option allows you add the sub heading.
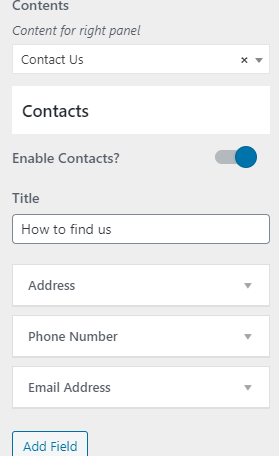
- Contents:This option allows you to select the content to be displayed in this section.
- Enable Contacts?:This option allows you to enable/disable the contact.
- Title:This option allows you to add the title.
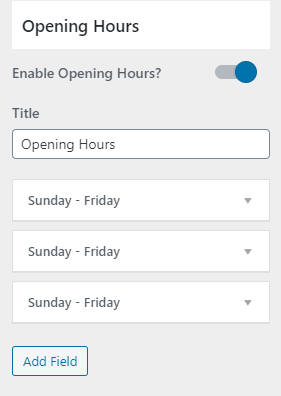
- Enable Opening Hours?:This option allows you to enable/disable the opening hour.
- Title:This option allows you to add the title
- Number Of Items:This option allows you to limit the no of items in this section.
How to manage Pre Footer Options?
1. From Customize section, go to Front Page Options.
2. From Front Page Options, you will see Pre Footer Options.
3. In Pre Footer Options you will see:
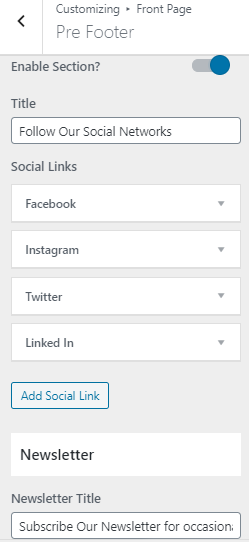
- Enable Section?: This option allows you to enable/disable the Pre Footer section.
- Title: This option allows you add the title.
- Social Links:This option allows you add the social links in the footer.
- Newsletter Title:This option allows you to add the newsletter title.
- Footer Widget Area Section: This section is setup from widget. So you need to go to Admin Panel / Appearance / Customize / Widgets / Footer Widget #Id. and add widget you like. So in demo the widget are Text and Recent Posts , Calendar , Gallery in Footer Widget ( 1, 2, 3 and 4) respectively. Refer below How to add Widgets? for more detail.
- Footer Copyright Section: To setup this section you need to go to Admin Panel / Appearance / Customize / Theme Options / Footer Options. Refer below How to manage Footer Options? for more detail.
